Feb 08, 2025
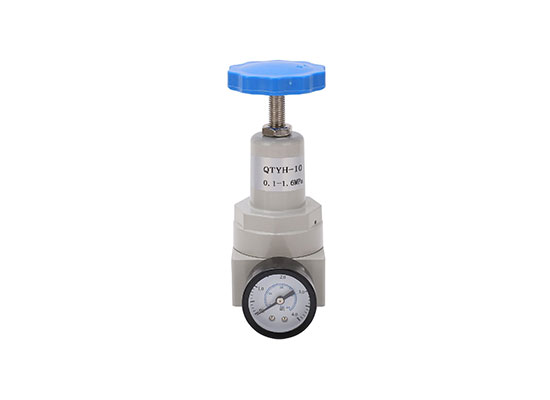
A pressure regulator is a device used in plumbing and gas systems to control and maintain a consistent pressure of the fluid or gas flowing through the system.
Its primary function is to reduce high incoming pressure to a safer, more manageable level for the pipes, appliances, and fixtures in the system.
In a plumbing system, for example, the pressure regulator reduces the water pressure coming from the main supply line to a level that is safe for the household or building’s plumbing system.
This helps prevent damage to pipes, fittings, and water-based appliances like dishwashers, washing machines, and water heaters.
Without a regulator, high pressure could cause leaks, burst pipes, or equipment malfunctions.

Before making any adjustments, turn off the air compressor and disconnect it from the power supply.
This helps avoid any accidental discharge of air or injury.
If the air compressor has been running, there will be air pressure stored in the tank. Release the air pressure by opening the drain valve on the tank.
This will help reduce any potential risk when adjusting the regulator.
The pressure regulator is typically found on the air compressor near the tank or the control panel.
It often has a dial or knob that allows you to adjust the pressure setting.
Most air compressors have two pressure gauges:
Tank pressure gauge: Shows the pressure inside the air tank.
Regulated pressure gauge: Shows the pressure being supplied to the air tools or equipment.
Take note of the reading on the regulated pressure gauge before adjusting it.
To Increase Pressure: Turn the regulator knob clockwise. This will raise the regulated pressure to a higher level.
To Decrease Pressure: Turn the regulator knob counterclockwise to reduce the pressure.
Adjust the pressure to the desired level, typically matching the requirements of the tools or equipment you'll be using.
For example, air tools like nail guns or spray guns might require specific pressures.
Once you've adjusted the pressure, turn the air compressor on and check the regulated pressure gauge.
Make sure the pressure is at the desired level for your equipment. If the pressure is still not right, repeat the adjustment process.
Some pressure regulators come with a locking mechanism to keep the adjustment in place.
If your regulator has this feature, lock it in place after you've made your final adjustment.
After adjusting the regulator, reconnect the air compressor to the power supply and test your air tools or equipment. Ensure that they are working efficiently at the newly set pressure.
◆ Turn off the Air Compressor and Release Pressure Turn off the compressor, disconnect the power, and open the drain valve to release pressure from the tank.
◆ Prepare the Pressure Regulator If the regulator needs fittings or connectors, wrap Teflon tape around the threads to prevent air leaks.
◆ Install the Pressure Regulator Attach the regulator to the compressor’s air outlet. If it's a threaded connection, tighten it, but don’t overtighten. For quick-connect fittings, just connect them.
◆ Check the Airflow Direction Ensure the regulator is installed correctly (most regulators will have an arrow indicating the airflow direction).
◆ Connect the Air Hose Connect the other side of the regulator to the air hose or pneumatic tools, making sure the connection is secure.
◆ Check for Leaks Turn on the compressor and check for any air leaks around the regulator and connections. If leaks are found, turn off the compressor and tighten the fittings.
◆ Adjust the Pressure Adjust the pressure using the regulator’s knob to set the desired output pressure.
◆ Test the System Turn on the compressor and test your air tools to ensure they work properly with stable pressure.
You May Interest In
FOKCA ©1998-2025 All Rights Reserved Sitemap